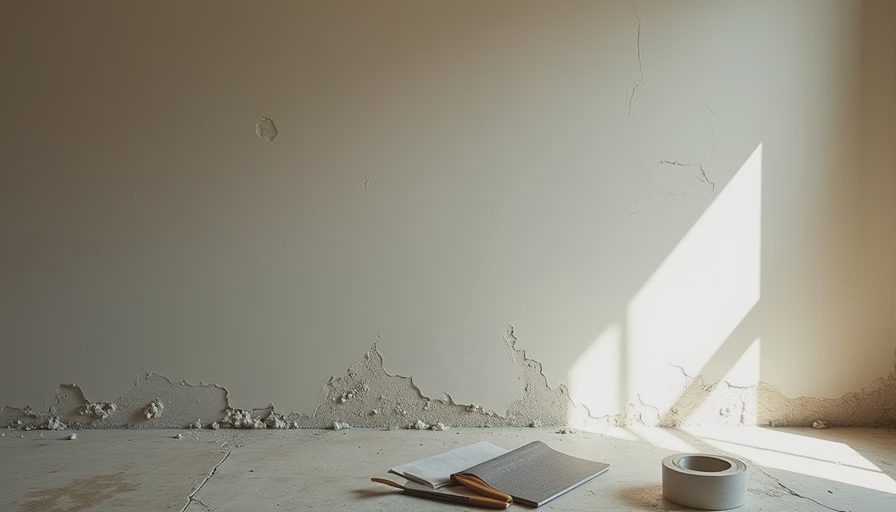
Of course, you’ve decided the project is worth doing yourself. Now let’s talk about one of the most common repairs in any older house: patching drywall. Do it wrong and you create a bigger eyesore than the original damage. Do it right and the repair disappears.
In our 1989 house I’ve patched everything from nail holes to fist-sized openings after plumbing work. The key is never treating the patch as a small spot. You treat it as a blending zone that extends well beyond the damage.
Why Small Patches Usually Fail
Homeowners often cut a square, slap on some mud, sand once, and paint. Three months later the edges telegraph, cracks appear, or the patch sinks. That’s because they didn’t build a proper taper and didn’t control dust and moisture.
Common failure modes:
Insufficient feathering (repair stays raised or visible)
Using only premixed compound on large areas (shrinks too much)
Poor tape adhesion leading to cracks
Rushing drying time between coats
Inadequate sanding and priming

If you skip the blending steps, six months from now you’ll be looking at obvious patches every time the light hits the wall at an angle.
Tools and Materials Checklist
Keep these ready in the garage:
Drywall saw or utility knife
Mesh tape or paper tape (I prefer mesh for speed)
Setting-type compound (45 or 90 minute) for base coats
Premixed all-purpose compound for final coats
6” and 12” putty knives
Sanding block + 120, 150, 220 grit screens
Shop vacuum with drywall attachment
Primer (stain-blocking if needed)
Drop cloths and painter’s tape
Budget range for a typical 6x6 inch repair: $15–$35 in materials. Much cheaper than calling a pro.
My Step-by-Step Drywall Patch Procedure
Step 1: Prepare the Area and Cut Clean Edges
Protect the floor and surrounding wall with drop cloths and tape. Cut back to clean, straight edges. Remove all loose paper and debris. Square up the hole so it’s easier to work with. Vacuum thoroughly.
Step 2: Apply Mesh Tape
Cover the edges with self-adhesive mesh tape. Extend it 2-3 inches beyond the hole on all sides. This prevents cracking at the joint.
Step 3: First Coat – Setting Compound
Mix or use pre-mixed setting compound. Apply a thin, wide layer over the tape, feathering the edges at least 8-12 inches out. The goal is a gentle slope, not a bump. Let it harden fully (check the bag for time).
Step 4: Second and Third Coats – Build the Taper
Use premixed compound for subsequent coats. Each coat should be wider than the previous one (feather 4-6 inches further out). Keep layers thin. Allow proper drying time between coats — this is where most people rush and create problems.
Step 5: Sand Progressively
Start with 120 grit to level, then 150, then 220 for smoothness. Use a shop vacuum attached to the sander or sanding block. Sand in good lighting at multiple angles. Run your hand across the wall — you should not feel any transition.
Step 6: Prime and Paint
Apply a quality primer over the entire feathered area. This seals the porous compound and helps the paint match better. Then apply matching wall paint. Two coats usually needed.

Follow the procedure and everything will be fine.
Pro Tips That Make the Difference
Feather widely. A good patch should be almost undetectable when you run a straight edge across it.
Control dust. Drywall dust travels everywhere. Keep the shop vac running and wipe surrounding areas with a damp cloth.
Lighting check. Always inspect under the same lighting the room normally uses. What looks good under bright work lights may still show under normal lamps.
For larger holes (bigger than 4 inches), consider using a drywall patch kit with aluminum backing or cut a precise piece of new drywall.
Last year I patched a hole in Chloe’s room after we moved some furniture. By feathering 18 inches out and taking time on the final sanding, the repair is invisible unless you know exactly where to look. Megan walked past it for weeks before I pointed it out.
Common Pitfalls and How to Avoid Them
Creating a bigger repair zone
This happens when you sand too aggressively in one spot and create a depression. Solution: wide, gentle feathering and multiple thin coats.
Visible seam lines
Caused by thick compound or poor feathering. Always build the slope gradually.
Color mismatch
New paint on old walls almost never matches perfectly. Plan to repaint the entire wall section or use a color-matched touch-up strategy.
Rushing drying time
Indiana humidity can extend drying. Touch the compound — if it’s cool or soft, wait longer.
I once tried to rush a garage wall patch before hanging new shelves. The edges showed for months until I finally sanded it down and reapplied. Wasted half a day. Now I build extra drying time into every schedule.
When to Stop and Call a Pro
If the damage involves:
Large areas (more than 2x2 feet)
Water damage with possible mold
Structural issues or multiple layers of old plaster
Ceiling patches (gravity makes it harder)
Then hire it out. For everything else, this procedure gives excellent results.

Make Clean Patches a Standard Skill
Print this procedure and keep it in your project folder. After two or three patches you’ll develop the feel for compound consistency and feathering distance. It becomes one of the highest-ROI skills in home maintenance.
Measure first (clean cuts, wide feathering, proper tools), then cut (apply compound with discipline). A well-done drywall patch should not announce itself. It should simply disappear into the wall.
Your repairs will look professional, last for years, and keep your weekends free for more enjoyable projects instead of fixing previous mistakes.


No signals yet — transmit the first.