At this point, you’ve scoped the project, prepared your workspace, and decided it’s safe for DIY. Now let’s replace a light fixture the right way — without turning it into an electrical guessing game or a trip to the breaker box every five minutes.
I’ve replaced over a dozen fixtures in our 1989 house: ceiling lights, bathroom vanities, garage shop lights, and outdoor porch fixtures. When you follow a disciplined sequence, the job is straightforward and safe. Skip verification steps and you risk shocks, short circuits, or flickering lights that come back to haunt you.
Pre-Work Safety and Tool Requirements
Never skip this part.
Confirm the fixture is on a dedicated switch (not part of a 3-way or smart system unless you’re comfortable with it).
Turn off the correct breaker. Then turn on the switch to verify the light is dead.
Use a non-contact voltage tester on the fixture wires and socket.
Have a second person or a charged phone ready in case of issues.

Essential tools:
Non-contact voltage tester (must-have)
Voltage tester with probe (for confirmation)
Wire strippers
Screwdrivers (insulated if possible)
Wire nuts and electrical tape
Ladder or stable platform
Drop cloth and painter’s tape
Headlamp or work light
New fixture with matching junction box rating
Budget range for a quality mid-range fixture + supplies: $45–$180. Cheap fixtures under $25 often look bad and fail quickly.
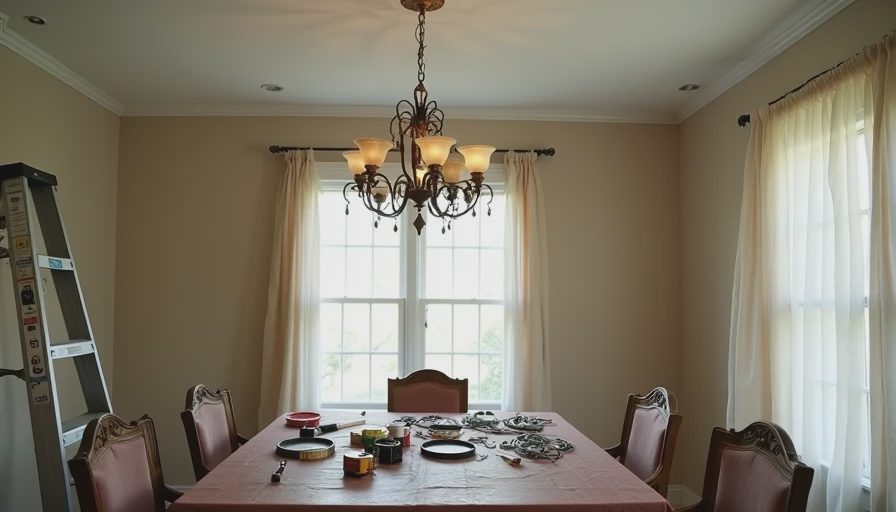
My Safe Step-by-Step Replacement Sequence
Step 1: Full Power Isolation and Verification
Turn off breaker. Tag it if possible. Test the switch — light must stay off. Use voltage tester on all wires in the box. Wait 30 seconds and test again. This double-check has saved me more than once when breakers were mislabeled.
Step 2: Remove the Old Fixture
Support the fixture while removing screws. Lower it carefully. Disconnect wires one at a time, noting colors and positions (usually black to black, white to white, ground to ground). Take a photo for reference. Remove old bracket if needed.
Step 3: Inspect the Junction Box
Check that the box is securely fastened to a joist or brace. Look for damaged wires, signs of overheating, or improper previous work. In our 1989 house I’ve found aluminum wiring in a couple spots — if you see it, stop and call an electrician.
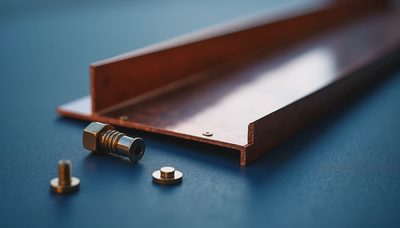
Step 4: Install the New Mounting Bracket
Most fixtures come with a new bracket. Screw it securely to the box. Make sure it’s level and strong enough for the new fixture weight.
Step 5: Connect the Wires
Ground wire first (green or bare copper)
White neutral wires together
Black hot wires together
Use proper wire nuts, twist tightly, and wrap with electrical tape for extra security
Tuck wires neatly into the box without pinching
Step 6: Mount the New Fixture
Attach the fixture to the bracket per manufacturer instructions. Install bulbs (do not exceed wattage rating). Restore power at the breaker.
Step 7: Test Thoroughly
Turn on the switch. Check for proper operation, no buzzing, no flickering, and no heat at the base after 10 minutes. Use voltage tester to confirm no live exposed parts. Have someone walk around to check light distribution.

Follow the procedure and everything will be fine.
Common Failure Points and How I Handle Them
Misidentified breaker
Our house has some confusing labeling. I always test multiple times and use the main breaker as backup if needed.
Too many wires in the box
Older homes often have multiple circuits or added switches. If the box is crowded, I use a deeper box extension or call a pro.
Heavy fixture
Chandeliers or large pendants need extra support. I add a brace across joists if the existing box isn’t rated for the weight.
Color code confusion
Red wires (travelers) or switched neutrals in some setups. When in doubt, I stop and map the circuit.
Last year I replaced the garage shop lights. The old fluorescents were failing and humming. Following this exact sequence, I installed new LED fixtures in under 90 minutes total. No tripped breakers, no issues six months later. Megan noticed the brighter, cleaner light immediately and said it made the whole garage feel more organized.
Safety Rules I Never Break
Work only on one fixture at a time
Never work with wet hands or on a wet floor
Use a stable ladder — no chairs or boxes
If you smell burning or see sparks, stop immediately and kill the main power
For anything over 200W, 3-way switches, or smart fixtures — get help or hire a pro
If it involves knob-and-tube wiring, aluminum wiring, or you’re uncomfortable with any step — call a licensed electrician. Better to pay for peace of mind than risk a fire or injury.

Why This Sequence Beats Guesswork
Rushing or skipping verification turns a 45-minute job into a frustrating multi-hour ordeal. By isolating power properly, documenting wire positions, and testing at every critical point, you remove almost all the uncertainty.
This procedure has become automatic for me now. I can replace most standard fixtures confidently and safely, knowing the result will look clean and work reliably for years.
Measure first (verify power off, inspect box, document wires), then cut (make the connections). When you flip the switch at the end and everything works perfectly on the first try, you’ll understand why procedure matters.
Keep this sequence in your project notebook. Next time a bulb flickers or a fixture looks dated, you’ll handle it systematically instead of guessing. Your lighting will be safer, brighter, and more reliable — without expensive mistakes or midnight electrical surprises.


No signals yet — transmit the first.