You’ve scoped the job, run your pre-start checklist, and set a realistic budget. Now let’s execute one of the most common homeowner upgrades without turning it into an all-weekend ordeal.
I’ve replaced at least eight faucets in our 1989 house and helped neighbors with theirs. When you follow a solid procedure, the whole job takes 2-4 hours depending on how seized the old parts are. Skip steps and you’ll be dealing with leaks, stripped threads, or multiple trips to the store.
Pre-Work Checks and Tools
Before touching anything, run these verifications:
Confirm you have shut-off valves under the sink that actually work. Many older houses have seized or nonexistent valves. Test them now.
Measure your existing faucet mounting holes (usually 4-inch centerset or 8-inch widespread). Buy the correct configuration.
Check supply line condition. If they’re old braided or corroded, replace them while you’re in there.
Clear everything from under the sink. Put a towel and shallow bucket ready for drips.

Essential tools (most you should already have in a proper garage setup):
Basin wrench (non-negotiable for tight spaces)
Adjustable wrench or channel locks
Screwdrivers (flat and Phillips)
Flashlight or headlamp
Rags and small bucket
Teflon tape / plumber’s putty
New supply lines (if replacing)
Caulk gun and bathroom caulk (mildew-resistant)
Budget range for a solid mid-grade faucet + supplies: $120–$280. Anything under $70 usually feels cheap and leaks within a year or two.
Step-by-Step Replacement Procedure
Step 1: Shut off the water and relieve pressure
Close both hot and cold shut-off valves. Open the faucet handles fully to drain the lines. Place the bucket under the supply connections. This simple step prevents a flood if something slips.
Step 2: Disconnect supply lines
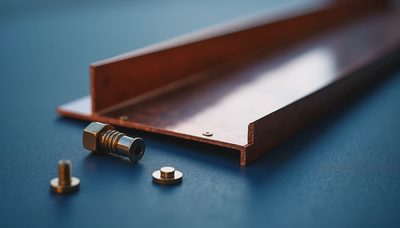
Use the basin wrench or adjustable wrench to loosen the supply lines from the faucet stems. Keep track of any rubber washers. If the lines are stuck, apply penetrating oil and wait 10 minutes. Don’t force it and strip the threads.
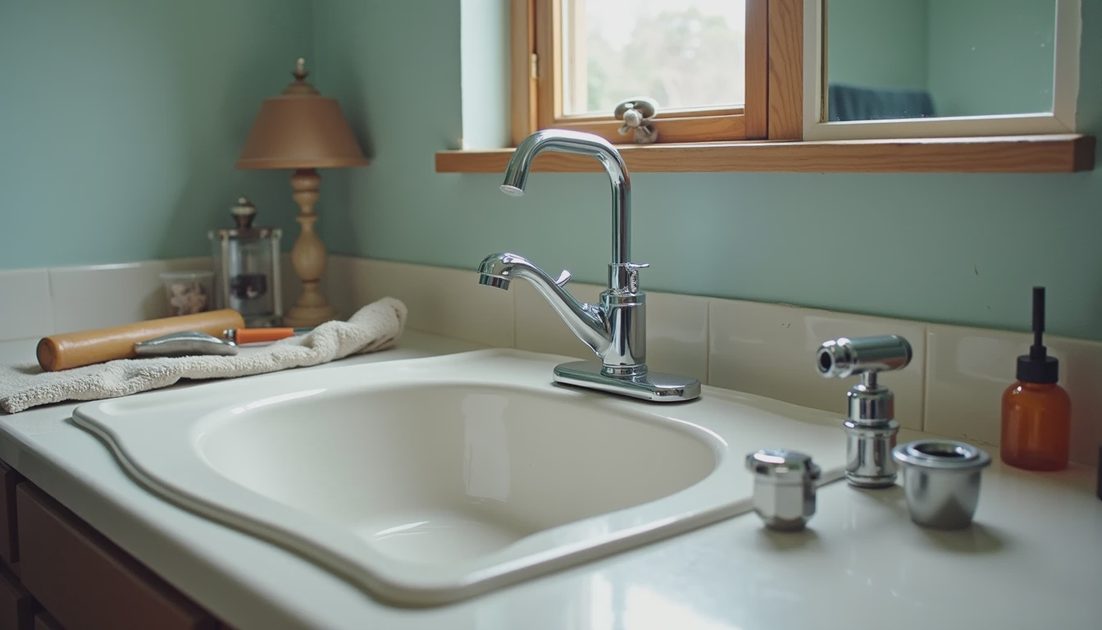
Step 3: Remove the old faucet
From above the sink, remove the handles and any decorative escutcheon plate. Underneath, loosen the mounting nuts with the basin wrench. These are usually plastic or brass and can be stubborn after 15+ years. Work carefully — you don’t want to crack the sink.
Once loose, lift the old faucet out. Clean the sink deck thoroughly. This is your chance to remove old putty, mineral buildup, and gunk.
Step 4: Prepare and install the new faucet
Apply a thin bead of plumber’s putty or use the gasket provided with the new faucet. Feed the new faucet lines through the holes. From underneath, hand-tighten the mounting nuts, then snug them with the basin wrench. Do not overtighten — you can crack the sink or strip threads.
Step 5: Connect the supply lines
Wrap Teflon tape clockwise on the threaded connections if needed. Attach the supply lines to the hot and cold stems. Hand-tighten first, then give them a quarter turn with the wrench. Reconnect the lines to the shut-off valves the same way.
Step 6: Final assembly and caulking
Reinstall handles and any trim pieces. Run a thin bead of silicone caulk around the base of the faucet where it meets the sink. Smooth it with a wet finger for a clean line. Let it skin over before using the sink.

Follow the procedure and everything will be fine.
Common Failure Points and How to Handle Them
Seized shut-off valves
If the valves won’t close fully, shut off the main water valve for the house. Replace the bad valves while you’re there. This adds time but prevents bigger problems.
Rusted mounting nuts
Penetrating oil, patience, and the basin wrench are your friends. If they’re truly frozen, you may need to cut them off carefully with a Dremel or hacksaw blade. Protect the sink with cardboard.
Cross-threading supply lines
Always start threads by hand. If it feels tight or gritty, back it out and try again. Forcing it creates leaks that are hard to fix later.
Low water pressure after install
Usually means a clogged aerator or debris in the line. Remove and clean the aerator screen.
I ran into the seized valve issue on our main bathroom faucet two years ago. Because I had scoped it properly and had the main shut-off location marked, I handled it without panic. The whole job still finished same afternoon.
Megan walked in while I was cleaning up and said the new faucet already looked like it belonged there. She also appreciated that the bathroom was usable again before bedtime.
Testing and Post-Install Checks
Slowly open the shut-off valves and watch for leaks at every connection.
Run hot and cold water separately and together. Check for smooth operation.
Look under the sink with a flashlight after 5 minutes of running water.
Let it sit for an hour and check again.
Wipe everything dry and clean the sink.
If you see any drips, tighten the offending connection a quarter turn and retest. Most leaks at this stage are minor and easy to fix.

Why Procedure Beats Speed
Rushing this job is how people end up with water damage or calling a plumber on Sunday evening at emergency rates. Take the time to do it right once. In our house, properly installed faucets have lasted years without issues.
The same logic applies to most plumbing tasks you should tackle yourself: preparation, correct tools, careful sequencing, and thorough testing. Skip any of these and small jobs grow teeth.
Measure first (verify conditions and lay out parts), then cut (make the connections). When you finish cleanly and turn the water back on with no drama, you’ll feel the satisfaction of a job done like a professional — without paying professional rates.
Keep this procedure in your notebook or digital folder. Next time a faucet starts dripping, you’ll handle it confidently and quickly.


No signals yet — transmit the first.