Now. You’ve scoped the job and run your pre-start checklist. Now you’re ready to work. This is exactly where many homeowners try to shortcut — and pay for it later.
I’ve done it myself. Years ago I patched a wall in Chloe’s room, slapped on some compound, sanded it roughly, and painted the same day because I wanted it done before dinner. Six months later the patch showed every edge, the paint sheen was different, and Megan gave me that look. I redid it properly. Lesson learned the hard way.
Surface preparation is not optional busywork. It is the difference between a repair that lasts and one that announces itself every time you walk past.
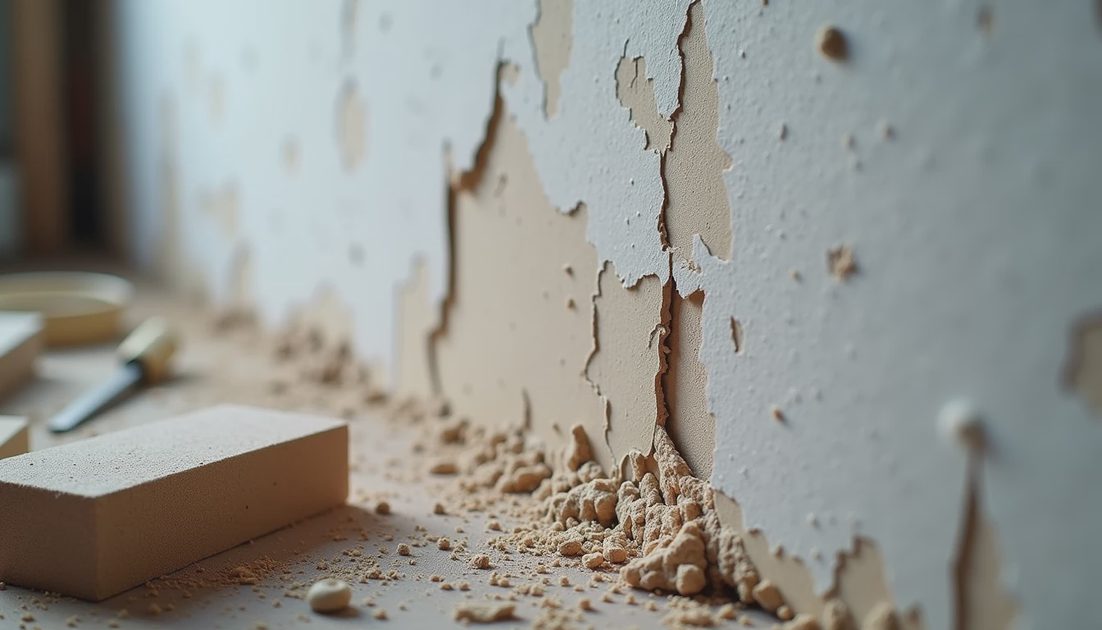
What Actually Happens When You Skip Prep
Skip cleaning, sanding, and priming and these failure modes show up predictably:
Paint Adhesion Failure
New paint over glossy old paint, dirt, or grease bonds poorly. Within 3-12 months you see bubbling, cracking, or flaking, especially in high-moisture areas like bathrooms or kitchens. I’ve seen entire walls where the top coat peeled in sheets after a humid summer.

Visible Joints and Patch Telegraphs
Drywall mud applied without proper feathering and sanding creates ridges. Even with multiple coats, poor prep makes the repair stand out under angled light. Three months later the patch looks sunken or raised.
Uneven Texture and Sheen
New paint over unprepared surfaces absorbs differently. You end up with patchy flat and glossy spots. In our 1989 house the original texture varies by room — skipping matching prep makes repairs obvious.
Early Dirt and Stain Show-Through
Residual grease, smoke, or water stains bleed through if not sealed with proper primer. I’ve seen this in garages where oil stains reappeared six weeks after painting.
Shortened Coating Life
Properly prepped surfaces let paint form a strong mechanical and chemical bond. Skipped prep cuts paint life in half. That “quick” $80 paint job becomes a $300+ redo sooner than expected.
If you skip surface prep now, you may pay for it later — usually with more material, more labor, and another disrupted weekend.
Real Examples from Our House and Garage
Last year I replaced a section of baseboard in the hallway after some water damage. I was tempted to sand lightly and paint. Instead I fully cleaned the area, feathered the edges, applied two thin coats of compound with proper drying time between, sanded progressively from 120 to 220 grit, wiped with tack cloth, and primed. The repair is invisible today.
Contrast that with the garage storage wall I rushed two years ago. I nailed up some pegboard without fully cleaning the old painted cinder block. Dust and loose paint underneath caused sections to look dirty within months. I eventually tore it down and did it right. Extra work because I tried to save time.
In the backyard storage shed I learned the moisture lesson. Skipped proper cleaning and priming on the lower walls. Now I see efflorescence and minor peeling every spring. Fixed it this year with full prep — pressure wash, dry completely, masonry primer, then top coats. Should last years longer.

Warning signs you’ll notice too late:
Paint feels rough or has high spots when you run your hand over it
Patch edges catch the light at certain angles
New paint discolors faster than surrounding areas
Caulk or filler pulls away from edges
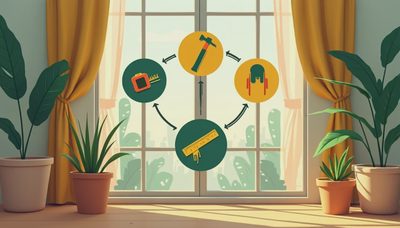
The Proper Surface Prep Sequence I Use Every Time
I treat prep like a manufacturing process step. No rushing.
Clean Thoroughly Remove all dust, grease, wax, and loose material. Use TSP substitute or good degreaser for walls. In the garage I use a shop vac with HEPA filter first, then wipe down.
Repair and Fill Fix cracks, holes, and gaps with appropriate filler. For drywall I use setting-type compound for strength on larger areas.
Sand Progressively Start with coarser grit to level (80-120), then finer (150-220) for smoothness. Feather edges at least 12-18 inches out so the repair blends. Vacuum between grits.
Wipe and Tack Remove all sanding dust with a damp microfiber cloth followed by tack cloth. Dust is the enemy of good adhesion.
Prime Where Needed Spot prime repairs and any bare surfaces. Use quality primer matched to the surface and top coat. In moisture-prone areas I use stain-blocking or masonry primer.
Final Inspection Check under strong light at different angles. Run your hand over the surface. Fix anything you feel or see before top coats.
This sequence takes more time upfront but eliminates callbacks and touch-ups. For a standard wall patch I budget 60-90 minutes on prep for every 30 minutes of painting.

Tool note: Invest in a good random orbit sander with vacuum attachment and quality sanding screens. They pay for themselves after two or three projects.
Build the Habit of Doing It Right
Megan sometimes teases me about how long I spend prepping versus finishing. She’s not wrong. But our repairs don’t need fixing again a year later. That’s the real time saver.
In manufacturing we track first-pass yield — how many units are right the first time. Same logic applies here. Thorough surface prep dramatically improves your first-pass success rate on home repairs and painting.
Next time you’re tempted to “just paint over it,” remember the failure modes. Take the extra hour now so you don’t spend a full day redoing it six months from now.
Follow the procedure and everything will be fine. Proper surface prep is one of the highest-ROI steps in any project. Measure first (inspect and clean), then cut (apply new materials). Your walls — and your wallet — will thank you.


No signals yet — transmit the first.