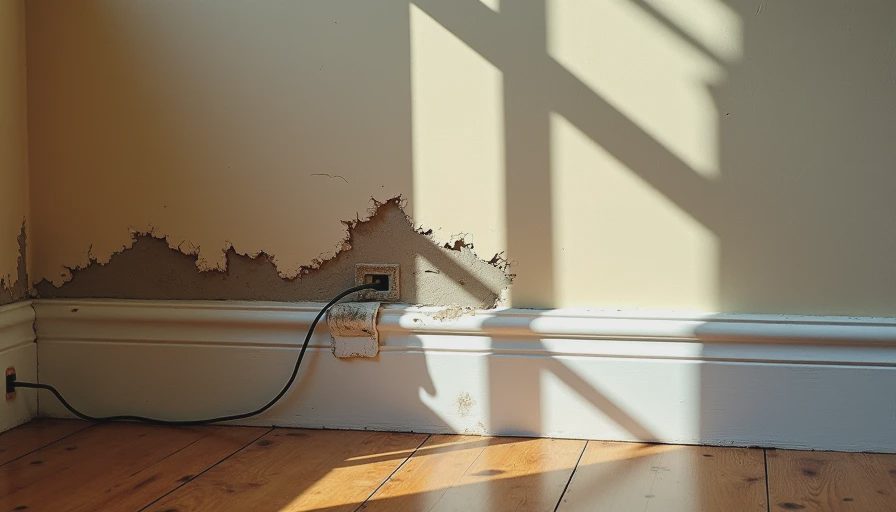
Now. You’ve patched drywall and made other repairs. But there’s one enemy that quietly destroys more homeowner work than almost anything else: moisture. It hides for months or years until the paint starts telling the story.
In our 1989 house in Indianapolis, with its original windows, typical Midwest humidity swings, and occasional basement dampness, I’ve learned to respect moisture the hard way. By the time you see bubbling paint or soft drywall, the real damage is already done.
Why Moisture Failures Are So Expensive and Common
Moisture doesn’t announce itself. It works slowly behind the scenes. When it finally shows up on the surface, you’re usually looking at more than just a paint job.

Most frequent failure modes in houses like ours:
1. Window and Door Perimeter Leaks
Poor flashing, failed caulk, or improper installation lets water behind the trim. It travels down inside the wall and shows up as stains or bubbling paint far from the actual entry point.
2. Basement and Crawlspace Dampness
High humidity or minor water intrusion migrates upward. Paint on lower walls starts peeling, and you discover efflorescence on the concrete.
3. Bathroom and Kitchen Splashes
Inadequate sealing around tubs, showers, and sinks. Water gets behind tile or vanities and softens drywall or causes mold.
4. Roof or Gutter Overflow
Clogged gutters or ice dams (common in Indiana winters) push water under shingles and into walls or attic.
5. Plumbing Micro-leaks
Slow drips inside walls from old supply lines or condensation on cold pipes.
If you ignore early moisture signs, six to eighteen months from now you may be tearing out drywall and dealing with mold remediation.
Early Warning Signs Most Homeowners Miss
Don’t wait for obvious bubbling paint. Look for these:
Musty smell in certain rooms, especially after rain
Paint that feels cool or soft to the touch
Slight discoloration or darkening even without visible water
Baseboards that feel loose or cupping
Higher than normal humidity readings (above 55-60% indoors)
Efflorescence (white powdery substance) on concrete or block walls
I missed the musty smell in our laundry room for months. When the paint finally started lifting near the floor, I had to open the wall and found hidden water damage from a slow drain leak. That repair cost time and material I could have avoided.
Megan noticed the smell first and mentioned it. I should have pulled out the moisture meter immediately instead of assuming it was just “old house smell.”
How I Hunt and Prevent Moisture Problems
I now treat moisture control as a continuous system, not a one-time fix.

Detection Tools I Keep Ready
Digital moisture meter (pin and pinless)
Infrared thermometer for spotting cold spots
Bright inspection light
Mirror and borescope camera (cheap USB version works)
Prevention Sequence for Any Project
Test Before Starting Always scan the area with a moisture meter before cutting or painting. Readings over 15-17% on drywall mean stop and find the source.
Fix the Source First Never paint over a moisture problem. Locate and repair the leak, improve drainage, or add ventilation before any cosmetic work.
Improve Ventilation and Humidity Control Bathroom exhaust fans that actually vent outside (not into attic), dehumidifier in basement, proper attic ventilation.
Seal and Flash Correctly Use quality exterior caulk, proper step flashing at windows/doors, and vapor barriers where appropriate.
Choose Moisture-Resistant Materials Greenboard or cement board in wet areas, mold-resistant primer, and quality exterior paint with good mil thickness.
Follow the procedure and everything will be fine.
Real Fixes in Our House
Last spring I found elevated moisture readings along the exterior wall in the living room. Turned out the gutter downspout was splashing back against the foundation. I extended the downspout, added grading away from the house, and treated the wall before repainting. No issues since.
In the garage I had condensation issues on the north wall. Added better insulation and a small exhaust fan. The tool wall and stored equipment stay drier now.
The backyard storage shed taught me the hard way about ground moisture. Skipped proper base preparation initially. This year I pressure-washed, applied masonry sealer, and used a vapor barrier. The difference is night and day.
When to Call a Pro for Moisture Issues
Suspected mold larger than a few square feet
Water intrusion from roof or foundation
Persistent high humidity you can’t locate
Older plumbing leaks inside walls

For detection and minor fixes, the tools and procedures above handle most situations. For anything structural or hidden, get a qualified pro and ask them to show you the source.
Warning sign: If you keep seeing the same paint failure in the same area after repainting, there is still an active moisture source. Stop painting and investigate.
Build Moisture Awareness as Standard Practice
Add moisture scanning to your pre-project checklist. Keep the meter in the same orange bin as your safety gear. Check basements and exterior walls seasonally, especially after heavy rain or snow melt.
Measure first (use instruments, not just your eyes), then cut (make repairs or apply finishes). This single habit prevents more expensive failures than almost any other procedure in this house.
Moisture doesn’t care how nice your paint color is or how perfect the patch looks. It keeps working until you address the root cause. Respect it, hunt it early, and fix it properly. Your walls, floors, and budget will stay healthier for years.


No signals yet — transmit the first.