We’ve covered scoping, procedures, failure modes, and individual garage improvements. Now let’s talk about the big one — the complete garage system I built that Megan still calls “overkill.”
She’s not wrong. I spent more time and money than most people would on organization, lighting, storage, and workflow. But this one paid off bigger than anything else I’ve done on the house.
Why I Decided to Overbuild It
Our 1989 garage started as a typical two-car mess: tools in buckets, half-used paint cans on shelves, mower buried under tarps. Every project began with 20-30 minutes of searching and cleanup. I got tired of wasting time I could spend actually working or with Megan and Chloe.
So I treated the garage like a small manufacturing cell at the plant: design for flow, visual management, durability, and minimal waste. Megan watched the plans grow and said, “You’re overbuilding this.” I agreed — but kept going anyway.
Key principle: Build it once, build it right, and maintain it forever.

The Core Systems I Over-Engineered
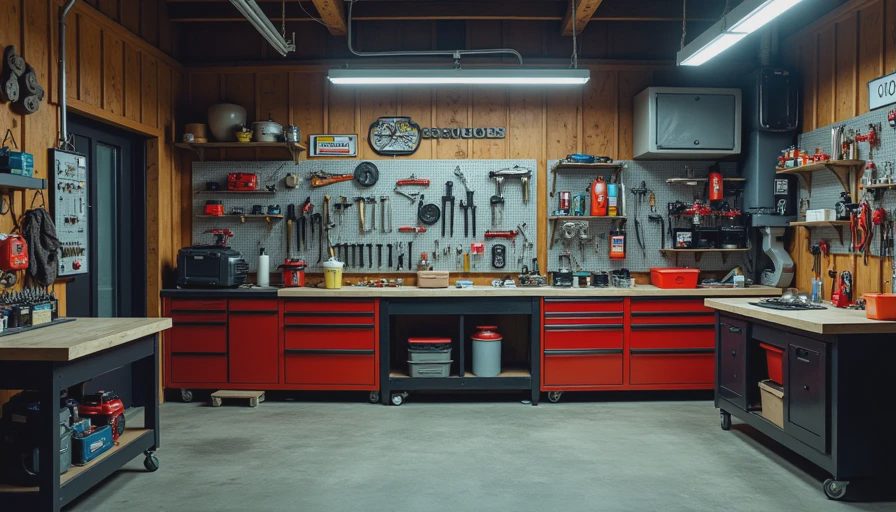
1. The Tool Wall & Shadow Board System
Heavy-duty pegboard covering 12 feet of wall. Every tool has a precise outline and label. High-use items at perfect height. I even added a small “temporary parking” zone for projects in progress.
2. The Workbench
2x6 framed top with 3/4" plywood and hardboard surface. Built-in vise, power strip with USB, dust collection port, and deep drawers organized by function. I reinforced it to handle 500+ pounds without flexing.
3. Zoned Storage & Workflow
Material storage with clear bins and labels
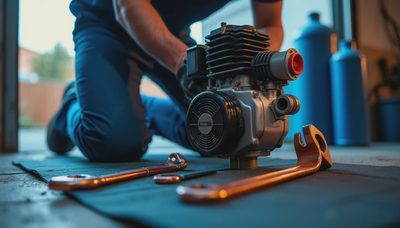
Small engine maintenance corner with drain pan and ventilation
Clear center aisle for vehicle access
Overhead storage for seasonal items only
Dedicated cleanup station near the door
4. Lighting and Power
Bright LED overheads plus task lighting over the bench. Multiple power drops so I’m never fighting cords.
5. Maintenance & Reset Procedures
Laminated checklists for end-of-project reset and seasonal deep cleans. Everything has a home, and empty spots are immediately obvious.
Total investment: around $1,650 and four weekends. More than I originally budgeted. Megan raised her eyebrows more than once.

Follow the procedure and everything will be fine.
The Payoff — Real Results Over Two Years
The system has earned its keep many times over:
Time saved: I can now find any tool in under 10 seconds. A typical weekend project starts 25-40 minutes faster than before. Over two years that’s dozens of hours returned.
Reduced duplicate purchases: No more buying a second tape measure because I couldn’t find the first one. Saved at least $300.
Fewer mistakes: Visual management means I notice missing tools immediately. Proper lighting and clean workspace mean cleaner work and fewer errors.
Equipment longevity: The small engine corner and proper storage have kept the mower and snowblower running reliably. No more gummed-up carbs or rusted tools.
Family benefit: Chloe can safely find her bike helmet or craft supplies. Megan actually enjoys coming out to the garage now because it doesn’t feel like a disaster zone.
Last month I needed to rebuild a section of fence after wind damage. I grabbed every tool, all fasteners, and the right saw in one trip from the garage. Finished the job in one afternoon instead of fighting clutter across two weekends. That single project made the whole investment worth it.
When Overbuilding Makes Sense
Not every system deserves this level of attention. I overbuild when:
The item gets used weekly or monthly
Poor performance creates safety risks or expensive mistakes
It dramatically reduces friction in high-frequency activities
The location (garage) is central to many other projects
I don’t overbuild decorative items or low-use seasonal decorations.
Failure mode if you underbuild: Systems degrade quickly, frustration returns, and you waste time and money fixing or replacing cheap solutions. I’ve been there.
Megan still occasionally says I’m too rigid about resetting the garage after every project. She may be right. But she also appreciates that when she needs something fixed, I can handle it efficiently without turning the house upside down first.

How to Apply This Thinking to Your Garage
You don’t need to do everything at once. Start with the highest impact areas:
Pick one wall and build a proper shadow board
Upgrade your main workbench if it flexes or lacks storage
Implement clear zones with floor markings or tape
Create checklists and stick to the reset habit
Add lighting where you actually work
Measure first (honestly assess your current pain points and usage), then cut (build durable solutions). Focus on systems that support real workflow rather than looking good in photos.
Final Reflection
Yes, I overbuilt the garage systems. And yes, Megan was mostly right about the initial effort and cost. But this is one case where the extra investment continues to pay dividends every single weekend.
The garage is no longer a storage problem — it’s a productivity tool that makes every other home project easier, safer, and more enjoyable. In a 1989 house with normal family life, that kind of reliability is worth the upfront discipline.
Follow the procedure and everything will be fine. Sometimes “overbuilding” isn’t overkill — it’s just building it right the first time.
Measure first, then cut. I saved myself thousands of wasted minutes and dollars by following this advice on the garage. You can do the same.


No signals yet — transmit the first.