OK! Your garage is running like a small factory and small engines are maintained. But a lot of the gear that supports weekend projects lives outside. For years our backyard storage was a mess of tarps, stacked bins, and exposed equipment. Every spring project started with digging through wet or dirty stuff. That changed when I built a proper storage upgrade.
This wasn’t a fancy shed for show. It was a systems solution designed for workflow, protection, and quick access. Total build cost came in around $1,450 — well within a realistic budget range — and it has paid for itself many times over in time saved and equipment preserved.
Why Basic Storage Fails in Indiana Weather
Our climate punishes poor storage:
Freeze-thaw cycles ruin unsealed wood and electronics
Humidity and rain cause rust and mold on tools
Wind-blown debris and critters get into everything
Constant searching wastes 20-40 minutes per project
I got tired of it. So I approached the backyard storage the same way I organize the garage tool wall: define the scope, plan zones, and build for long-term efficiency.

Planning the Upgrade (Scope Before Sawdust Applied)
Before cutting any lumber I followed my own rules:
Listed everything that needed storage: mower, snowblower, pressure washer, long tools, seasonal materials, bulk supplies, bike accessories.
Measured the available backyard space and setbacks per local rules.
Decided on size: 8x10 ft with high walls for storage.
Set budget range: $1,200–$1,800 including foundation and roofing.
Designed for workflow — wide door, good lighting, clear floor space.
Key design decisions:
Pressure-treated foundation raised 6 inches off ground
Oriented to minimize afternoon sun and prevailing wind
Large double doors for easy equipment access
Multiple windows for natural light and ventilation
Heavy-duty roofing with overhang
Electrical outlet inside for charging or tools
Step-by-Step Build Process
Step 1: Site Preparation
Leveled the area, added gravel base for drainage, and built a pressure-treated skid foundation. This single step prevents 90% of future moisture problems.
Step 2: Framing and Sheathing
Standard 2x4 framing on 16" centers. OSB sheathing. I paid extra attention to corner bracing and hurricane ties — overkill for most, but it makes the structure rock-solid.
Step 3: Roofing and Siding
Metal roof with proper pitch and drip edge. Smartside or LP Smart siding for low maintenance. All seams sealed and caulked.
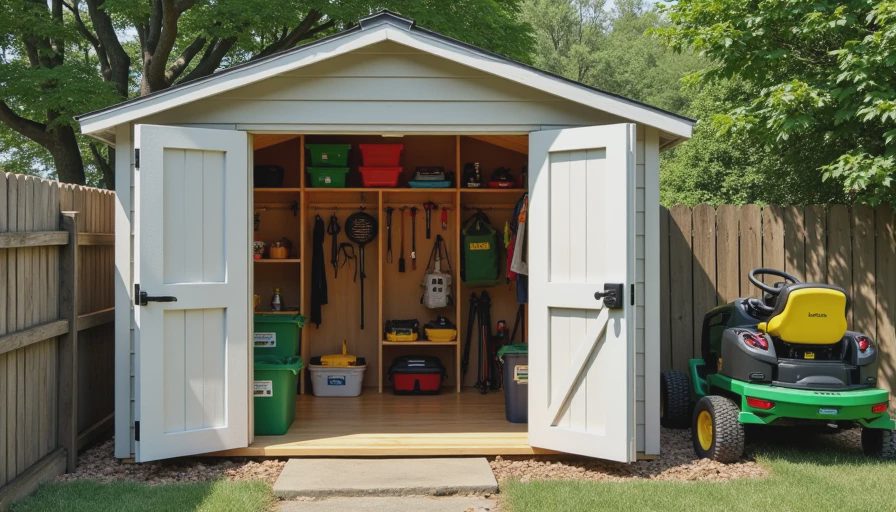
Step 4: Interior Systems
Heavy-duty wall shelving on one side
Pegboard and French cleat system on the back wall
Overhead storage racks for lightweight seasonal items
Floor marked with zones (mower zone, tool zone, material zone)
Small workbench/counter along one wall
Step 5: Final Details
Heavy-duty lock, door sweeps, ventilation gable vents, and interior LED motion light. Painted the interior bright white for better visibility.
Follow the procedure and everything will be fine.
The whole build took four solid weekends. I did most of it myself but hired a buddy with a nail gun for one day to speed up framing. Total time investment was worth it.

How This Upgrade Changed Weekend Projects
The difference is night and day:
Grab the pressure washer in 30 seconds instead of digging under a tarp
All bulk paint, caulk, and fasteners stay dry and organized
Mower and snowblower have dedicated parking spots with room to maneuver
Long-handled tools hang neatly instead of falling over
I can start a project in the evening without first spending half an hour organizing
Last summer I needed to repair the fence after a storm. Everything I needed — screws, drill, level, saw, brackets — was in one place, dry and ready. Job finished in one afternoon instead of dragging across two weekends.
Megan calls this shed my “second garage.” She’s not wrong. Chloe also loves that her bike and scooter now have proper homes instead of living in the way.
Maintenance and Organization Rules I Follow
To keep the system working:
Monthly quick sweep and check for moisture
Seasonal deep clean and inventory
Everything has a labeled home (same shadow board logic as the garage)
Rotate stock — oldest materials used first
Annual pest inspection and sealing check
Failure mode if you skip these: The shed becomes another cluttered dumping ground within a year. Discipline keeps it functional.
Budget and Decision Lessons
I could have bought a cheap plastic or metal shed for half the price. I chose to build because:
Custom size and layout fit our exact needs
Much better durability in Midwest weather
Interior organization options far superior
Long-term cost of ownership is lower
If you’re considering a similar upgrade, run it through the full scoping and budget process. Measure the space accurately. Calculate total cost including foundation and anchoring. Factor in time savings over the next 5-10 years.

Warning: Cheap sheds often end up costing more when they blow away, leak, or fall apart after two winters.
Start Smaller If Needed
You don’t have to build a full shed. Good first steps:
Build a simple lean-to or covered rack for mower and equipment
Install heavy wall shelving in the garage for overflow
Create a weatherproof bin system with proper sealing
Measure first (inventory your actual storage needs and space), then cut (build or buy with purpose). The goal isn’t perfection — it’s removing friction from every outdoor project.
This backyard storage upgrade is one of the smartest systems investments I’ve made. It supports the garage workflow, protects expensive equipment, and gives me back valuable weekend time. Every time I walk out there and find exactly what I need in seconds, I know the extra effort was worth it.
Follow the procedure and everything will be fine. A well-planned storage system doesn’t just hold your stuff — it makes every future project easier, cleaner, and faster.


No signals yet — transmit the first.